
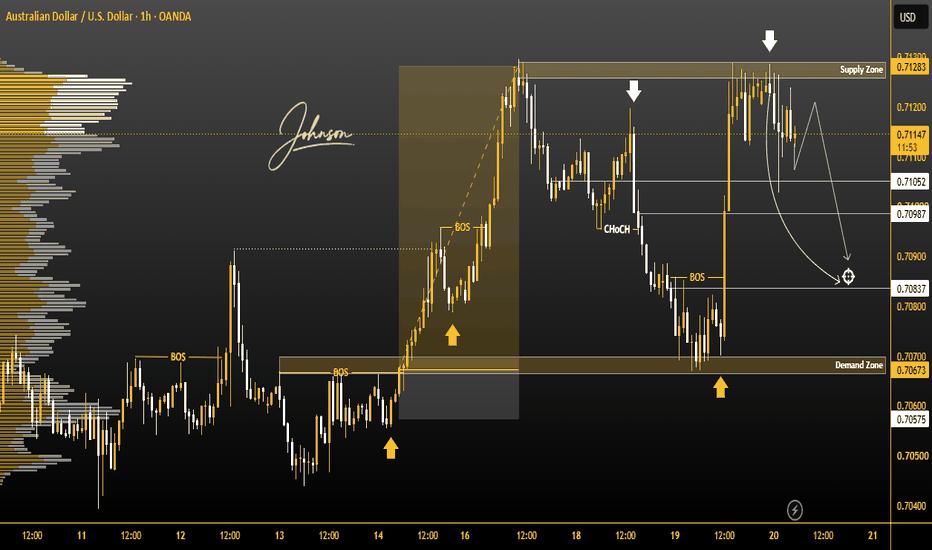
AUDUSD AUDUSD is currently trading in an important area where both the Demand Zone and Supply Zone are showing strong market reaction. This suggests that price may continue to respect these zones and move between them until a clear breakout or breakdown occurs.
On the 1H timeframe, traders should carefully monitor price action around these key zones. A strong rejection from the Demand Zone could support a bullish reaction, while rejection from the Supply Zone may create selling pressure.
🎯 Potential Downside Targets
Target 1: 0.71000
Target 2: 0.70900
Target 3: 0.70800
These targets can become active if bearish momentum develops and price continues moving lower from the current zone.
Market Structure
Pair: AUDUSD
Timeframe: 1H
Key Areas: Strong Demand & Supply Zones
Market Condition: Range / Zone Reaction
Targets: 0.71000 → 0.70900 → 0.70800
⚠️ Trade Confirmation
Do not rely on the zone alone. Wait for 1H price action confirmation, rejection, or a clear structural shift before taking a position. A sudden breakout can invalidate the current zone-to-zone setup.
Tuyên bố miễn trừ trách nhiệm: Quan điểm được trình bày hoàn toàn là của tác giả và không đại diện cho quan điểm chính thức của Followme. Followme không chịu trách nhiệm về tính chính xác, đầy đủ hoặc độ tin cậy của thông tin được cung cấp và không chịu trách nhiệm cho bất kỳ hành động nào được thực hiện dựa trên nội dung, trừ khi được nêu rõ bằng văn bản.
 Chưa có bình luận nào. Hãy là người đầu tiên chia sẻ ý kiến của bạn.